Logging In
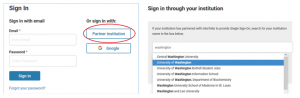
To log in, go to Interfolio login and click the Partner Institution button. Start typing “washington” or select University of Washington from the drop down menu. Click Sign In. For users without a UW ID, create a Google account and then select sign in with: Google. Note: Recommended browsers for Interfolio Faculty Search are Chrome, Mozilla and Safari.
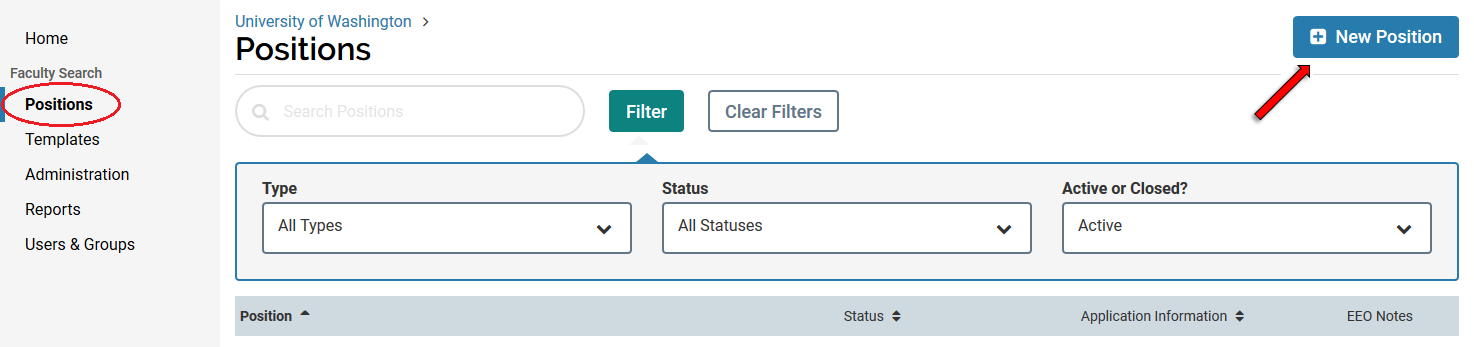
Once you log in, you should land on the Positions page. If the page header does not say ‘Positions’, select the Positions option from the side menu. If you have Administrator access, you should see any positions to which you have access displayed in a table. To create a new position, click the New Position button in the top right corner of the window.
Setting a Position Type
A window will open and you will need to choose the most appropriate level of your position from the Select Type drop down menu. The Position Type will determine the approval routing for your position.
UW has six unique Position Types – three for departmentalized units and three for undepartmentalized units. Which position type you choose will depend on the title of your position, whether it is on your hiring plan, and whether the draft advertisement requires review by the Office of Academic Personnel and Faculty (APF). 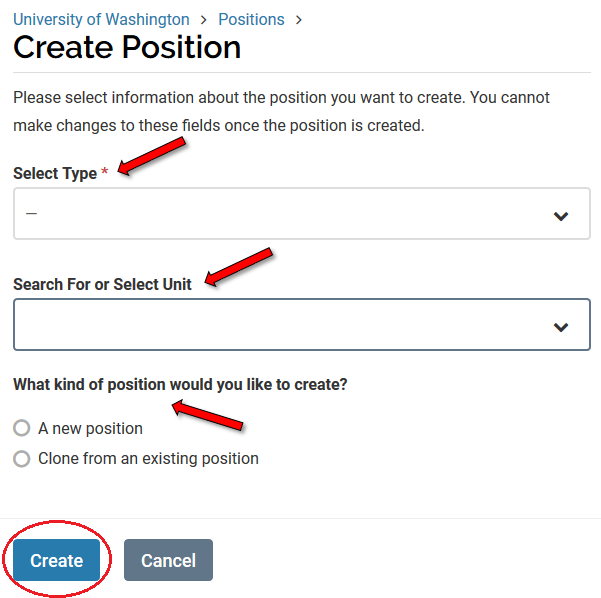
Select the appropriate Position Type from the drop down menu.
After selecting the position type, you will need to select the unit where the new position will be located from the ‘Search For or Select Unit’ drop down menu. All UW appointing units should be loaded into the menu. If you don’t see your unit, contact the Office of Academic Personnel and Faculty (APF).
Finally, you can choose to either create the new position from scratch or clone (use settings from) an existing position. If you clone a position, you will have the opportunity to edit aspects of the position you wish to change from the original but be aware that cloning a position also clones any institutional information (vaccination requirements, etc.) that was automatically added to the original posting that may now be outdated. Best practice is to either copy and paste only the information wanted or to create a new position from scratch.
Important points to consider before clicking Create:
- Once you set the Position Type and click Create, you will not be able to edit the Position Type. If any of the approvers determine that the Position Type needs to be corrected, you will have to start the Create a Position process from scratch. With that in mind, the following two points are critical.
- Units who are unsure whether their position’s rank/title is eligible for permanent residency should carefully review the list of titles on the Permanent Residence Sponsorship page. Even if you have no intention of sponsoring the future hire for permanent residency, if the rank/title is on the eligibility list, it you must choose the 1-DEP (for departmentalized colleges/schools) or 1-UNDEP (for undepartmentalized colleges/schools) Position Type.
- Units who are unsure whether their position’s rank/title is required to appear on their hiring plan should reach out to their dean’s office for confirmation. Hiring plan requirements may change from year-to-year and units will need the hiring plan number—as applicable—to complete the Create a Position process, so consulting the dean’s office is always a good idea.
To move to the next step, click Create.