Introduction
The following steps will help you navigate the process of managing a search in Interfolio, which includes:
- Assigning/changing statuses
- Requesting letters of recommendation on behalf of an applicant
- Editing an existing position
- Closing a position
Following this user guide will also help you manage a position that is in compliance with new UW standards.
Preparation steps
As with the Create a Position guide, this guide is intentionally minimal so users—especially first time users—have a concise reference that covers the basics of managing a search. Interfolio, however, has a wide variety of additional functionality to support or enhance the search process. Links to learn more about additional features are included throughout this guide.
The full menu of Interfolio Faculty Search guides is available at Help for Interfolio Faculty Search. Be aware, however, that Interfolio’s guides will not have UW-specific recruitment requirements and may not reflect institutional settings UW has put in place for UW users.
Understanding the evaluator view
It may be useful to familiarize yourself with how the search committee views and assigns ratings to applicant materials. Having a basic understanding of the evaluation process will help Administrators support the success of the search committee (Evaluators). Please review Evaluator’s Guide to Faculty Search for more information on the Evaluator experience.
Last updated August 18, 2022 at 10:45 am
Logging in
To log in, go to Interfolio login and click the Partner Institution button. Start typing “washington” or select University of Washington from the drop down menu. Click Sign In.
Once you log in, you should land on the Positions page. If the page header does not say ‘Positions’, select the Positions option from the side menu. If you have Administrator access, you should see any positions to which you have access displayed in a table. Locate and click on the position you would like to manage.
Last updated August 23, 2022 at 11:02 am
Accessing applications
When you click on a position, you will see a list of applicants to that position. To start reviewing, check the box next to the applicant name. If you check boxes for multiple names or select all applicants by clicking the box at the top of the table, you will be able to review applicants in succession without having to return to the list.
Tagging applicants
There are many reasons why a unit might want to tag an applicant(s). Units who have large applicant pools or who want to leverage areas of expertise within their search committee will often use tags to assign applicants to a particular search committee member for the initial review. Tags can also be used to identify particular characteristics of an applicant or applicants (e.g., research focus) which can then help Administrators or Evaluators sort and/or assign them more easily. Both Administrators and Evaluators can assign tags.
To assign a tag, check the box next to one or more applicants and click the ‘Tag’ button in the toolbar. Select the tag you want to apply, or select ‘Add new tag’ to create a new one.
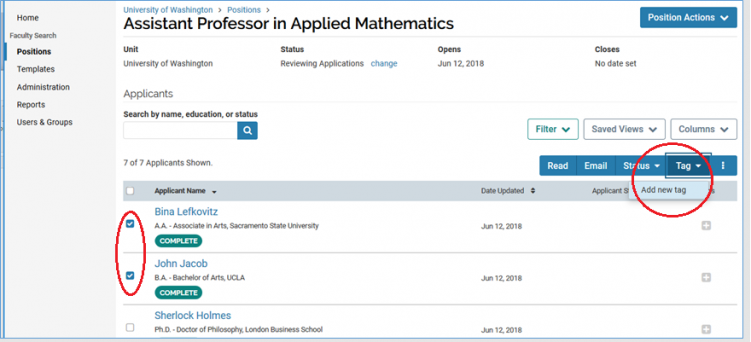
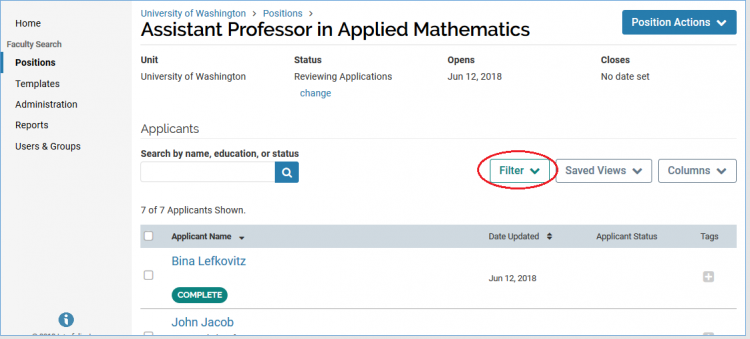
The tag will appear on the same row as the applicant’s name. Once tags are applied, you can filter the applicant list by tag by clicking the Filter button near the keyword search bar. For more information on tags, visit Use Tags to Mark and Sort Applications.
Find applicant materials
To see applicant materials, check the box next to an applicant(s) name and click the ‘Read’ button located in the blue toolbar.
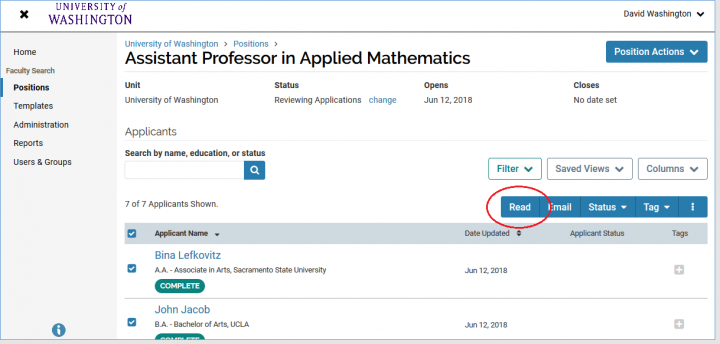
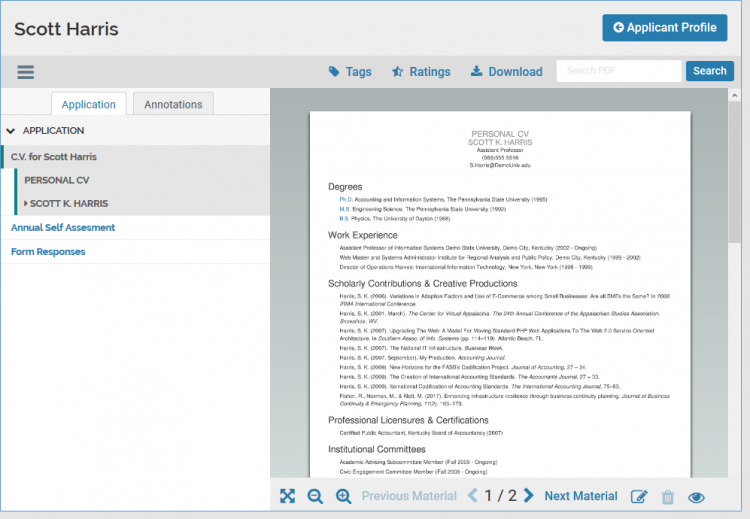
You will be taken to the Materials Viewer window where a menu of application materials will display on the left.
Edit a position
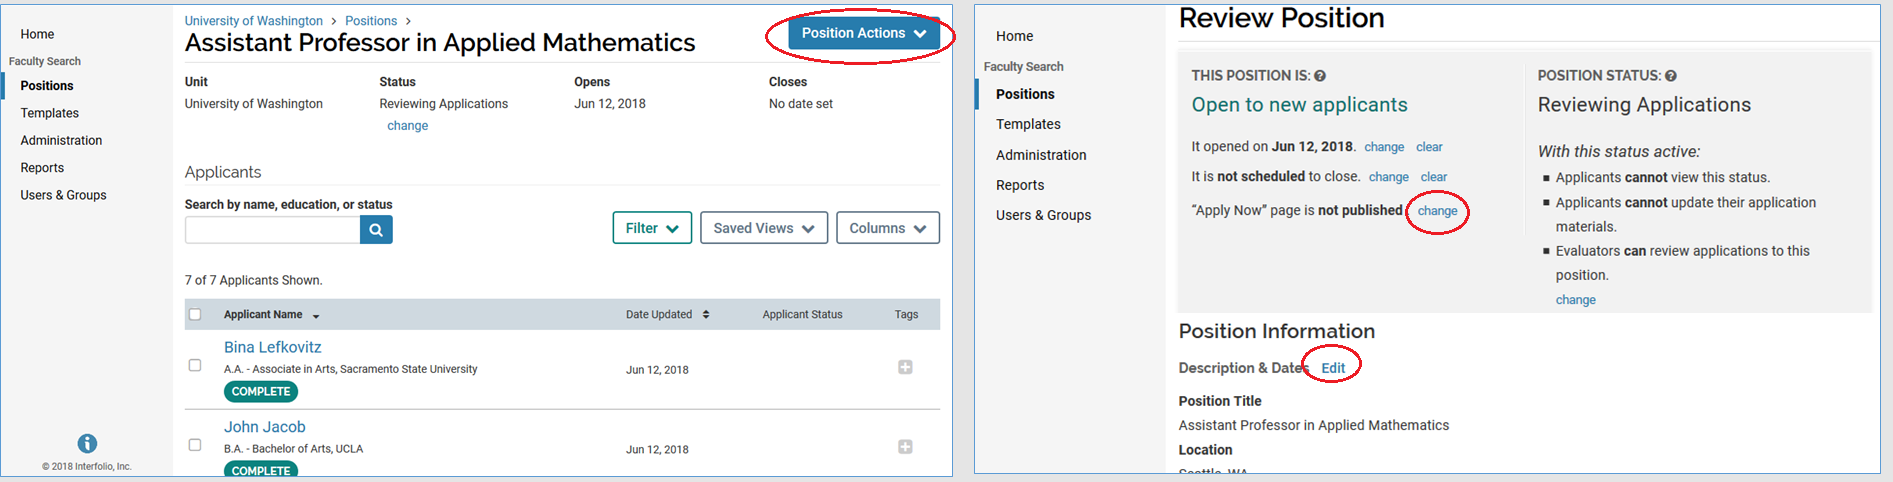
If you need to edit details of your position, select the position from the Positions list, click Position Actions in the top right corner of the window, and select ‘Edit Position’. The Review Position page will appear and the Administrator can then click Edit or Change to revise the various sections populated during the Create a Position process.
While some areas are easy to change at any time, such as adding/removing members of the search committee, there are other areas where a change could unintentionally impact application status and applicant notifications. Interfolio automatically logs and can report on when changes are made and by which user.
Position description or qualifications
Once your position is approved and live, you should not change the position description or qualifications. If you absolutely need to change these areas, contact your Academic Human Resources Specialist to discuss the circumstances that warrant the change. Be aware that any approved change would need to be pushed out to any external job posting so that all instances of the advertisement accurately reflect the change.
Application materials or forms
Once review of the applicant pool has begun, you should not change the the requirements around application materials or required forms. If an applicant submits all required materials and forms, and then the requirements change, that applicant will receive a notification that their application is incomplete. This could be confusing both for the applicant and for any evaluators who might have already reviewed applicant materials.
There are some situations where changing application requirements would be appropriate – for instance, when an applicant pool is narrowed down and the committee wants to request additional materials from the short list (e.g., contact information for references, a writing sample, etc.). However, the Administrator should first disposition and archive all applicants who are no longer under consideration before editing application materials or forms. Please review the section in the user guide on Assigning Disposition Statuses before editing application materials or forms.
Published vs. unpublished
If you didn’t identify a close date during the Create a Position process, you will continue to receive applications until the search is closed or until you unpublish your position.
Units will often set a priority deadline (e.g., “Initial deadline for receipt of complete applications is…”) for their search and start reviewing applications once that deadline is reached. If you want to either temporarily or permanently halt the receipt of new applications after the priority deadline, you should unpublish your position by changing the published status on the Review Position page as illustrated below.
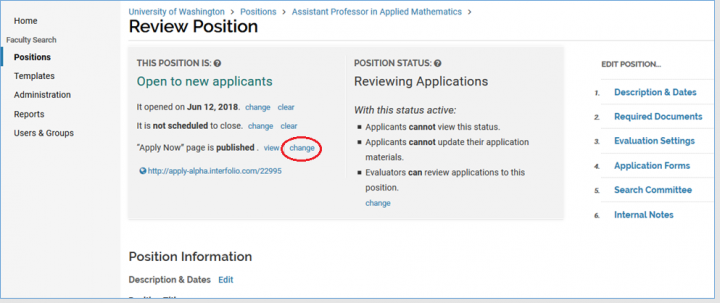
Unpublishing your position will not close the position, nor will it cut off Evaluator access. It simply removes the “Apply Now” button on the position’s landing page and notes that the position is not accepting applications.
Best Practice – Unpublishing the position
When unpublishing a position, the unit should keep in mind and be in compliance with minimum posting period requirements. Positions that are eligible to be sponsored for permanent residency must be posted for a minimum of 30 days after the initial publication in a national professional journal (i.e., Chronicle of Higher Education). Administrators should not unpublish positions during this minimum posting period.[/bestpractice]To allow applicants to resume applying, simply change the status on the Review Position page back to published and the “Apply Now” button will reappear on the landing page.
Evaluation criteria
As the search progresses through the different stages of applicant review (i.e., long list, short list, interview), it may be that a unit wants to apply additional evaluation criteria appropriate for that stage. For instance, the search committee may screen entire applicant pool against general criteria and then apply more specific criteria as the applicant pool gets successively smaller. The Administrator – in consultation with the search committee – can add criteria by editing the Evaluation Settings section of the position.
Last updated August 18, 2022 at 9:41 am
Assign statuses and dispositions
As a federal contractor, UW is required to track disposition data in order to maintain compliance with applicable regulations and laws. To support compliance with these audits and the principles behind them, the UW has established a set of standard position statuses, application statuses, and applicant disposition codes. Statuses identify when an applicant fall out of consideration and disposition codes identify why. UW statuses have been organized into a matrix (UW Academic Personnel Status/Disposition Matrix) for your reference.
Only Administrators and Committee Managers can assign statuses and all applicants must be assigned a disposition code before the preferred candidate can be hired and/or the search can be closed. At various points during a search, the Administrator will need to assign and revise statuses to accurately reflect what is happening in the search. Administrators should not assign statuses or disposition codes without first consulting with the search committee or search committee chair.
To assist Administrators and Evaluators in understanding the relationship of position statuses to application statuses to applicant disposition codes, please review the UW Academic Personnel Status/Disposition Matrix.
Position and application status
UW has created distinct statuses to identify the phase of the search (Position Status) and the stage of application review (Application Status). These statuses are necessary to identify where in a search an applicant falls out of consideration and also give department, college, and university leaders an idea of how searches are progressing. The UW statuses are set at the provost level, but are applied at the hiring unit level; this means they can’t be deleted or redefined, but the unit determines when they are applied.
Position statuses
Position Statuses are high level phases of the search. They include:
- Accepting Applications
- Reviewing Applications
- Interviewing Applicants
- Offer Stage
- Search Complete
After a position has gone through the approval routing and been approved, the Administrator will need to change the Position Status to Accepting Applications in order for applicants to be able to apply to the search. Similarly, the Administrator will need to change the Position Status from Accepting Applications to Reviewing Applications before Evaluators can access complete applications.
The appropriate time to change from Accepting Applications to Reviewing Applications is when:
- Initial evaluation criteria have been entered into the position
- You have reached the priority/initial application deadline (if applicable), and
- The search committee is ready to review applications
To change the position status, click the change option in the Status section at the top of the applicant list window and select option that best represents the status of your search.
Application statuses
Application Statuses are specific phases of the review process itself. In essence, they are sub-phases within a general Position Status. For example, the broad phase of Reviewing Applicants might take several rounds with the applicant pool getting smaller and smaller with each review. In FS, those unique rounds of review are called Application Statuses. Application Statuses include:
- Review for Minimum Qualifications
- First Review
- Review of Long List
- Review of Short List
- Phone/Video Screen
- Interview
- Offer
- Closed with Hire
- Closed without Hire
Setting the Application Status helps units organize their search and disposition the applicant pool more efficiently. How and when Application Statuses are applied is at the discretion of the unit. Some might not use all the statuses or they might choose to use them in a different chronological order.
To change the Application Status, select all the applicants who are still under consideration by clicking the check box next to the Applicant Name header and then click the Status button in the blue tool bar at the top right of the the applicant list. From the drop down menu, select the applicant status option that best represents the phase of review the applicants are moving into.
The appropriate time to change Application Statuses is when you have completed a distinct phase of the review process (e.g., Review for Minimum Qualifications), you have dispositioned and archived applicants who won’t be moving on (discussed below), and you are ready to move to the next phase of review. Do not change the position or application status without first applying disposition codes and archiving applicants who won’t be moving on.
Assign statuses for short list reports
Reports of aggregate EEO data for a subset of the applicant pool, often referred to as the “short” or “preliminary” list, have to be generated outside of FS. To address this need, Tableau dashboards have been created and are accessible to deans/chancellors for their respective school/college/campus. The reports will update weekly.
In order for applicants in a given position to appear on the dashboard, Administrators should check that the following criteria are met:
- Position is currently open
- Position Status is set to “Reviewing Applications”
- Applicant’s Status is set to “D. Review of Short List”
- Application is complete with no outstanding required documents
- A minimum of five applicants are included on the short list
For information on how to update either the Position Status or the applicant’s Status, refer to the Position and Application Status section.
Disposition codes
UW has created distinct disposition codes to identify why an applicant falls out of consideration (i.e., reason for rejection). As previously noted, these codes are necessary to meet federal reporting requirements. The UW disposition codes are set at the provost level, but are applied at the hiring unit level; this means they can’t be deleted or redefined, but the unit determines to whom they are applied. Administrators should not assign disposition codes without first consulting with the search committee or search committee chair.
Assigning disposition codes To assign a disposition code to an applicant, go to the applicant list and check the box next to the applicant name(s). Click the Disposition Code button from the blue tool bar at the top right side of the applicant list. Select the disposition code the search committee has determined best represents the reason the applicant is falling out of consideration. If you selected multiple applicants, the disposition code will be applied to the batch. Repeat this process for all applicants falling out at the current stage of review (i.e., position-application status).
Once you have completed assigning disposition codes for the current stage of the review process, click the additional options button (far right button in the blue tool bar) and select Archive.
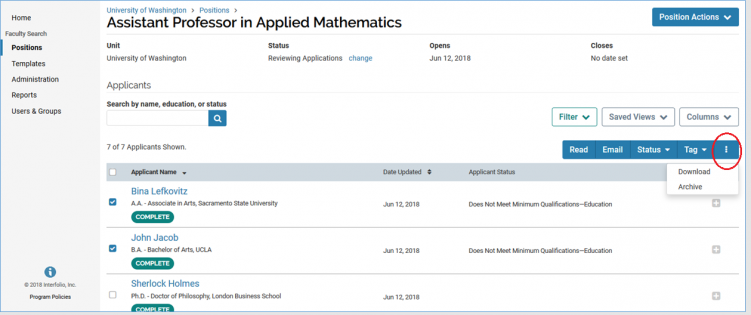
Applicants who are archived will no longer appear on the applicant list. This makes the review process easier and more manageable for both the Evaluators and the Administrator. To view archived applicants or to unarchive an applicant, review the Interfolio guide at Archive or Unarchive an Application.
Once you have dispositioned and archived applicants, you can move forward with changing the Application Status as described in the previous section. Remember that all applicants must eventually be assigned a disposition code. The Office of Academic Personnel and Faculty (APF) will not approve the hire of your preferred candidate until all applicants are dispositioned.
Note the Not Top Ranked Interviewee disposition code should be used for interviewees who are not the top choice, but whom the unit wants to keep in play until the preferred candidate accepts or declines an offer. This is a placeholder status and should be changed to another disposition code before closing the search. That will require going into the applicant archive and changing the disposition code to another disposition code or unarchiving the applicant to move them forward to the offer stage.
Last updated August 18, 2022 at 9:44 am
Requesting letters of recommendation
If an applicant was asked to provide a list of individuals who could be contacted for a letter of recommendation/reference, Administrators—on behalf of the search committee—can request letters from those contacts without involving the applicant in the request process. As letters are received, they will automatically be added to the applicant’s materials for review.
To request letters on behalf of an applicant, go to the applicant list and click on the applicant name. On the Applicant Profile page, click the Actions drop down menu and select Request recommendation.
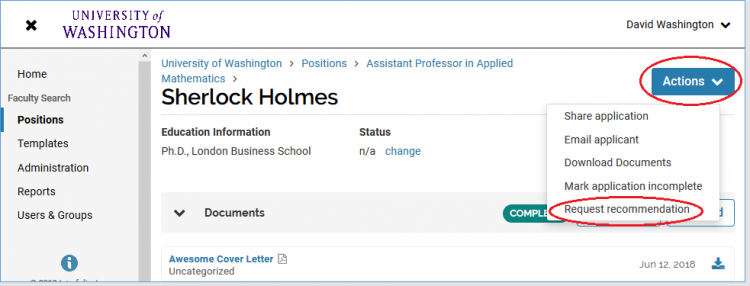
Fill out the request form, set a due date for receipt of the letter, and write an email message to the letter writer. You can add files (e.g. CV) by clicking the ‘Add’ button beneath the message field. The letter writer will receive the message you create and appended file(s) along with instructions for submitting the letter.
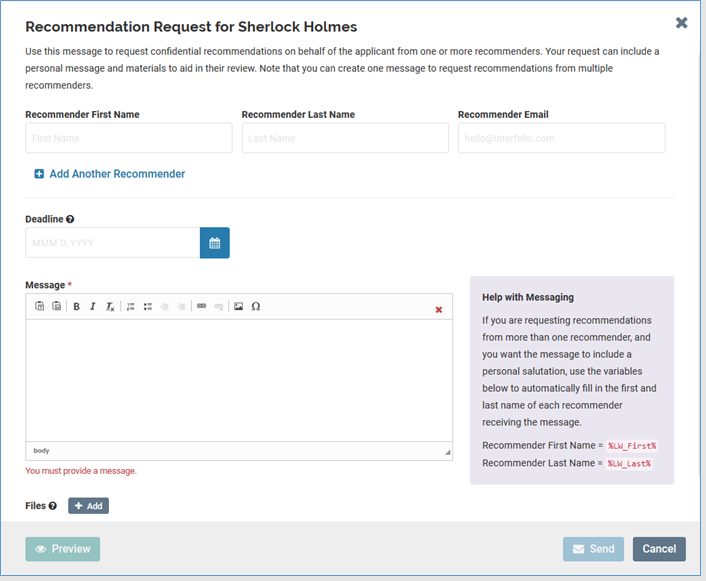
You can request recommendations from more than one letter writer at a time by clicking ‘Add Another Recommender’ as indicated above. Add letter writer information and repeat as needed.
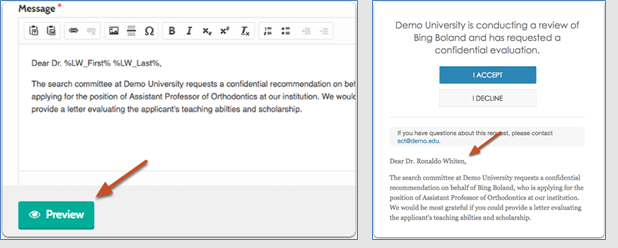
Use the variables for first and last name located in the informational box in the bottom right corner to have Interfolio automatically personalize the invitation to all the letter writers you’ve entered. Cut and past the variables into your salutation line (i.e., Dear Professor %LW_First% %LW_Last%,). You can change ‘Professor’ to whatever salutation is appropriate for your letter writers (e.g., Professor, Dr., etc.).
To learn more about how to set Interfolio to automatically personalize the message sent to each letter writer, please review Automatically fill in the first and last names of recommenders when sending letter requests to multiple letter writers.
Once you have your email drafted, you can preview how your message will appear to recipients by clicking the ‘Preview’ button in the lower left corner.
To understand the reference submission process from the letter writer’s perspective, please review For External Evaluators: Guide to Providing Requested Evaluations.
Last updated August 18, 2022 at 10:42 am
Closing a position
When a search is complete, the Administrator will need to officially close the search in Interfolio. A search will either be closed with a hire or closed with no hire. Prior to closing a position, whether with a hire or without, the Administrator must remove from the search committee all Evaluators and any Committee Managers other than the Administrator themselves.
Note: If the search process is ongoing, but you no longer want to receive applications or have your job posting visible on the UW Academic Personnel Job Board, you should not close the position. Closing it affects Evaluator access to applicant materials and should not be used if review is still in progress.
Closing with hire
If your search has been successful and a candidate has accepted an offer, you must assign a disposition code, the reason for not moving forward in the hiring process, to any applicants who don’t already have one. Repeat the process outlined in the Assigning Statuses and Disposition Codes section of this user guide.
Interviewees who were given the Not Top Ranked Interviewee placeholder status, must be changed to another status that reflects why they weren’t the preferred candidate. You will need to filter your applicant list to see Archived applicants in order to make this update.
Once you have assigned a disposition code to all your applicants, complete the following critical steps:
- Change status to Search Complete.
- Under the Position Actions drop down menu choose Close Position.
On the Closing Position page, indicate that an applicant was selected to fill the position by clicking Yes. If one or more applicants was selected to fill the position, click Add Applicant.
Note: If you indicate a selection was made, you must select at least one applicant to continue.
A list of available applicants will appear in a window. Find the name of the applicant(s) you want to select, and click “Add”.
You can sort the list of applicants by name, email, and status. You can also search the list by name or email address, and fill the list by status.
Click “Close” to send the selected applicant(s) for approval.
This opens a page that lists the approver for the selection. The approver(s) displayed will receive an email indicating that a selection has been made and is awaiting their approval. You can personalize this email with a message to the approver.
The position will now appear under positions as Waiting for approval.
Once the position is approved by Academic HR, your position is closed.
The position will no longer appear in the list of active positions, but will appear in the list of closed (archived) positions viewable by setting the positions filter to display closed positions.
When submitting a New Hire, Transfer or Lateral Move process in Workday for a new faculty hire that is associated with an approved line on your approved Hiring Plan, units should enter the hiring plan number and the Interfolio ID number into the “Comments” section of the Workday business process.
To find these numbers, open the Internal Information page of your Interfolio ad. The hiring plan number should have been entered in the “Position ID or Requisition Number” field.
Closing without hire
If you are closing your search without a hire, you must assign a disposition code to any applicants who don’t already have one. Repeat the process outlined in the Assigning Statuses and Disposition Codes section of this user guide. Interviewees who were given the Not Top Ranked Interviewee placeholder status, must be changed to another status that reflects why they weren’t the preferred candidate. You will need to filter your applicant list to see Archived applicants in order to make this update.
If an offer was made and the preferred candidate declined it or it was rescinded, that applicant must be assigned either the Offer Declined or Offer Rescinded disposition code.
Once you have assigned a disposition code to all your applicants, complete the following critical steps:
- Change status to Search Complete.
2. Under the Position Actions drop down menu choose Close Position.
On the Closing Position page, indicate that no applicant was selected to fill the position by clicking ‘No’. You have the option of leaving a note to document why no hire was made. Click Close Position.
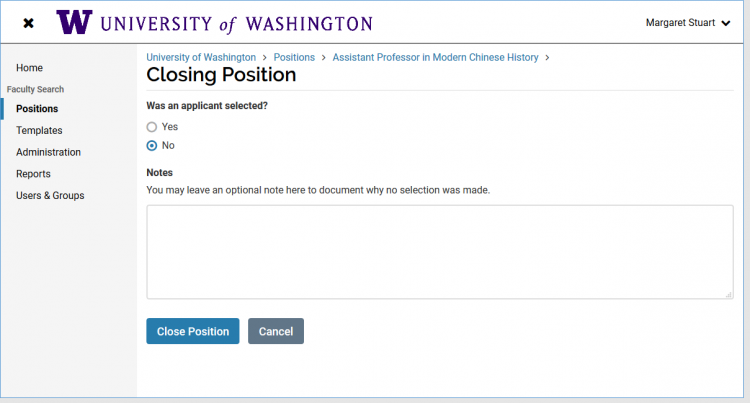
Your position is now closed. The position will no longer appear in the list of active positions, but will appear in the list of closed (archived) positions viewable by setting the positions filter to display closed positions.