This user guide is for school/college/campus (S/C/C) unit administrators and provides instructions on how to submit promotion and/or tenure (P&T) records via Sharepoint to the Office of Academic Personnel (OAP). It also outlines steps to complete prior to the submission deadlines.
Ensuring Workday Record Accuracy
S/C/C administrators receive an email from AHR requesting pre-submission Workday checks for:
- Education History – Run R0689 to check
- Start and End Dates
- Joint Appointments
- Dual Appointments
- FTE, Roster %, Tenure Values – Run R0707 to check
- Waiver Years – Run R0686 to check
- Location
Correct any inaccuracies before submitting candidate records.
Access to Submit Records
In the fall, OAP will contact each school/college/campus to confirm who should have access to submit P&T records.
For any changes during the P&T cycle, the party responsible for submitting P&T records to the Office of Academic Personnel must send a request to acadpers@uw.edu with the following information:
- Name of employee needing access
- Employee NetID
OAP will send confirmation when access has been approved for the employee.
These steps can also be taken to withdraw access from the P&T Sharepoint folders.
Submitting a P&T Record
- Create a single PDF for each candidate’s materials, as described on the submissions page. Reminder: Materials must be in the order of the Promotion and Tenure Checklist. All materials included in the electronic P&T record will be reviewed.
- Go to your S/C/C’s SharePoint submission folder, using either:
- the link in your “SharePoint submission information” email, or
- the link from the /ptinfo/ web page
- Within this folder, upload a single PDF named “<<Employee ID>> <<Lastname>>, <<Firstname>>.pdf”, for example “12345678 Smith, Alex.pdf”.
- The submitted employee ID is very important. Double-check that the employee ID you are using is correct.
- Your submission is complete.
Corrections
There are two types of corrections that may be needed:
- Pre-printing corrections: Corrections requested prior to the record being printed for final review
- Post-printing corrections: Corrections requested after the record has been printed for final review
In both cases, corrections are needed to the electronic records to ensure the final record is complete.
Pre-printing corrections
Unless specifically otherwise requested, if OAP requests a record correction, you must re-submit the entire P&T electronic record/PDF again. Submit the revised P&T record using the “Submit a record” instructions above.
The PDF can be named exactly the same name as original submission: “<<Employee ID>> <<LastName>>, <<FirstName>>.pdf”.
Post-printing corrections
If a post-printing correction is needed, you will be emailed by OAP requesting the correction. Send the correction back via email.
If many corrections are needed, OAP may request the entire record be resubmitted and reprinted at your school/college/campus’s expense.
Tips for Uploading Records
Depending on the number and size of records you’re submitting, and your computer’s Internet connection, uploading records may take some time to complete. If you have a slow internet connection, each record may take more than 5 minutes to upload.
If you are uploading records directly via SharePoint, you can use the “Upload” button or drag the record into the browser window. SharePoint will begin uploading the record, but you must keep your browser open until you see the record in the folder. You can check progress through the SharePoint “Uploading…” button.
If you are uploading records using the “OneDrive sync” tool as described in the “Submitting Many Records at Once” section (below), you can check the “sync progress” as described in this Microsoft video (see approximately 01:08).
Additional PDF Tips
See also OAP’s Creating/Editing PDF Files page.
Legibility and Ability to Print
- Colors need to be printable (e.g. no dark blue on light blue)
- Content needs to be legible when printed
- Everything to be reviewed must be in the PDF itself (e.g. hyperlinks to additional content will not be reviewed)
- Fonts/font sizes need to be legible
- Pages need to be 8.5”x11”
Technical Formatting
- Avoid embedded files in submitted PDFs. Embedded files will not be read/reviewed
- Do not use Acrobat PDF portfolio or PDF encryption
- Do not use embedded PDF video or audio
- Do not use embedded JavaScript
- Ensure no special characters are used in PDF names
- Submission should not include PDF comments
Policy and Timing
- Follow your unit’s scanning policy and records retention policy
- Submitted PDFs need to be final; they could be processed at any time
- Submitted records may be processed at any time; processing will happen at 8am each work day but may also occur at other times
Processing
OAP will process submissions each business day at approximately 8am. When OAP “processes” submissions, the PDFs will be removed from your submission folders. However, a zip file of each processed record will be created for your reference. Zip files will be created in a subfolder of your submission folder called “Past Submissions.”
Check whether each candidate record has been received via the P&T info page.
Submitting Many Records at Once
If you need to submit many records at once, you may be able to use the SharePoint “ OneDrive Sync” tool. This is an optional tool to help S/C/C’s that have many records to submit at once.
To use this tool:
- Ensure you have the OneDrive sync application on your computer. This application may be installed already.
- Here are Microsoft’s instructions for installing OneDrive sync on Windows.
- Here are Microsoft’s instructions for installing OneDrive sync on OS X.
- Navigate to your S/C/C’s submission folder.
- Click the “sync” button in the menu bar.
- You may see a prompt, “Getting ready to sync” in your browser.
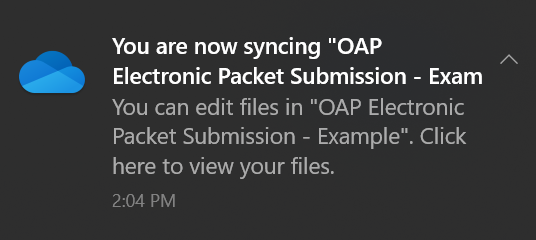
- If everything worked properly, you should see a notification from OneDrive sync, that says something like “You are now syncing OAP Electronic Packet Submission – Example”.

- You should then see a new folder in File Explorer corresponding to the submission folder.
- You can drag files into this folder, following the same structure outlined in “Submitting a record,” above.
- OneDrive sync will synchronize what you do with the SharePoint folder. You can confirm this by going to the SharePoint submission folder or by checking in your taskbar to ensure that OneDrive sync is running and looks like a cloud:

If you have any issues with the OneDrive sync tool, review Microsoft’s “fix OneDrive sync problems” instructions, and/or contact your unit’s IT support.
Updates and Questions
If you have questions or need to make changes, such as adding new administrators/changing someone’s access during the year, email acadpers@uw.edu.